Monday, December 20, 2010

Snowman Card


Merry Christmas!  I thought I'd share a card that I made for my son this year, using a technique that I saw Jennifer McGuire use in one of her videos.  It's really easy to do.

You use 2 coordinating colors of Distress Ink (I used Peeled Paint and Broken China), and an acrylic block.  Start with the first color, and apply it to the whole block.  Then apply the darker color to just the edges.  Spray it with a little water, and press the block onto your paper.  (I used watercolor paper.)  Gently lift the block from the paper, and blend any concentrated pools of ink with a paper towel.  Just dab it gently.  Then, as a optional step, you can spritz it with some shimmery sprays.  Although I used some that I made myself, any of the commercial sprays should work.  To minimize curling, use a heat gun on the front and back of the paper.

For the images on the card, I used my Christmas Cheer Cricut cartridge and E.K. Success snowflake punches.  Any border punch you have would add a nice touch as well.

I hope to post one more time before Christmas; but if I don't, have a Merry Christmas and a Happy New Year!

Monday, December 13, 2010

Holiday Quick Tip #3: Tiny Tags

Hi guys!  Hope your holiday season is going smoothly and you aren't too frantic.  I'm doing OK, and I'm a little ahead of schedule actually.  So I had a few minutes to record one more Holiday Quick Tip video.  I'm going to show you how to make the most adorable little tags from scraps of plain white cardstock.  Please leave a comment if you like the video.  Enjoy, and thanks for stopping by!

Friday, December 3, 2010

Holiday Explosion Box


Create this quick, easy Holiday Explosion Box using your favorite holiday cardstock and Glue Dots ®.

Materials:
7 ½” x 7 ½” piece of heavy cardstock for box base
3 7/8” x 3 7/8” piece of coordinating heavy cardstock for lid
Scoring board
Paper trimmer
Bone folder
Embellishments (optional)


Directions:
For the Base:
  1. Score the 7 ½” x 7 ½” piece of cardstock  2 ½” in from all 4 sides.
  2. Score a diagonal line from each outside corner to the matching corner of the interior square (see photo).

  1. Cut off the corners on the diagonals.
  2. Fold along score lines to form box.  Crease with bone folder.  Do not adhere the box together; the lid will hold it closed.


For the Lid:
  1. Score the 3 7/8” x 3 7/8” piece of cardstock  5/8” in from all 4 sides.
  2. Cut along one scored line per side, as shown in photo.

  1. Fold along score lines to form lid.  Crease with bone folder.
  2. Using Craft Glue Dots®, adhere tabs.  Be sure to apply the dots on the top side of each tab.

  1. Embellish as desired.


Tuesday, November 30, 2010

Happy Birthday Banner

Here is a project I just completed for the Glue Dots (R) Design Team.  It's a very versatile banner that can be used for boys, girls, and even adults.  I made it for my son's birthday and plan to use it for my daughter's in January.  You can change the colors if you want to make it more masculine or feminine, or even use baby shapes for a baby's birthday.  Have fun!


            Materials
·        Cardstock:  black, red, blue, yellow, green, light green, purple, patterned
·        Craft Glue Dots ®  
·        Cricut machine and cartridges  (I used Sure Cuts a Lot software to cut the letters and  the George and Basic Shapes cartridge to cut the scalloped circles and triangles.  You can find similar images on other cartridges.) – Provo Craft
·        Sizzix machine and dies (candle, balloon)
·        Souffle pens – Sakura
·        Glitter gel pens – Sakura
·        Gold brads

            Directions  (Refer to photos for placement of all pieces.)

1.      Using Cricut machine and cartridges of choice, cut the following:
·        14 scalloped triangles at 4” from red, blue, yellow, and green
·        14 circles at 3 ½” from black cardstock.
·        the letters “H-A-P-P-Y-B-R-T-H-D-A-Y” AT 3” from purple cardstock.
2.  Using Sizzix machine and dies, cut 4 candles and 2 balloons from yellow, light green, and patterned papers.  Add details with glitter gel pens.    
2.      Using Souffle pens, add dots and dashes around the edges of the circles and triangles.
3.      Adhere circles to triangles, following pattern in photo.
4.      Stamp owl onto white cardstock using permanent black ink. 
5.      Using the photo as a guide, adhere letters and shapes to black circles using Glue Dots ®.
6.      Punch holes in top corners of triangles, and attach with brads.


Wednesday, November 24, 2010

How to Make Snowman Earrings

Happy Thanksgiving!  To kick off the holiday season, I've made a video showing how to make these adorable snowman earrings.  You can make them in about 5 minutes, or you can buy a pair at my Etsy store:  http://www.etsy.com/shop/scrapjanny.  Have a wonderful Thanksgiving; and, if you make these earrings, please email me with photos.  I'd love to share them here.  Thanks for stopping by, and remember to be your crafty self.

Tuesday, November 23, 2010

Fall Wreath

Red, orange, yellow, green . . . .  No, I’m not reciting the color spectrum that you learned in school.  These are the rich, brilliant colors of fall that make it the most spectacular of all the seasons.  It’s truly a feast for the eyes, and it’s quite simple to bring some of that splendor into your own fall home decor in the form of a paper-leaf wreath.
 
  Here are the supplies you will need for this project:
The first thing you need to do is die cut or punch a variety of leaves.  For my wreath, I cut leaves with my Big Kick Big Shot and Cricut, and supplemented these with some smaller leaves punched with a leaf punch.  You can also cut acorns, walnuts, or any other shapes that represent autumn.

After you’ve cut all your shapes, add some details by scoring veins into your leaves with an embossing stylus and foam pad.  I used a real leaf as a model.

Apply chalk or ink to the embossed areas to add dimension and make them stand out.

Using a die-cut machine, a circle cutter or a plate, cut a doughnut shape to create the wreath base.  Adhere the leaves and other shapes to the wreath, layering as you fill up the wreath.

This is a great project to do with the kids.  Don’t limit yourself to only fall scrapbook paper and cardstock.  You can use any paper that will work with your tools and machines, including your children’s construction paper.  Happy fall, y’all!

Thursday, November 18, 2010

Holiday Quick Tip #2: Use Digital Stamps

Hi everyone!  Thanks for checking out my second Holiday Quick Tip.  There are so many free digital images on the Internet, why not grab some to use for your holiday cards this year?  And you know I can't resist Snoopy!  Happy Holidays, and check back soon for the next tip!

Thursday, November 11, 2010

De-Coloring Your Photos


I have a new article up on Scrapjazz.  It's all about how to convert your color photos to black-and-white, using Photoshop Elements.  Check it out here:  De-Coloring Your Photos.

Happy scrapping!

Tuesday, November 9, 2010

Birthday Card

This is a card that I made for a Gina K. Sketch Challenge. I cut the ovals using my Coluzzle and outlined the mailbox and the inner oval with a Stardust Gelly Roll pen by Sakura.  Happy Stamping!

Stamps: Gina K. Spring Mix
Paper: White Ultrasmooth (TAC), aqua blue, Rust textured (The Paper Company)
Ink: Palette Noir Black
Accessories: Lime Green and Ruby Stickles, Fiskars border punch, E.K. Success corner rounder (large purple)
Techniques: Colored pencils and Odorless Mineral Spirits

Friday, November 5, 2010

Holiday Quick Tip #1: Make Tags From Scraps


Sorry for the poor quality of the video.  This was done SUPER quickly, and it's straight from my Blackberry.  Check back soon for another Holiday Quick Tip.  Thanks for stopping by!

Thursday, November 4, 2010

Monday, November 1, 2010

Halloween Projects

Hi there!  I've been so busy making Halloween projects that I seem to have neglected my blog lately.  Sorry about that!  Here are some of the reasons I've been so busy.  The toppers would make great embellishments for those Halloween pages.  Have fun, and I hope everyone had a Happy Halloween!
 
Skittles Treats

 
Peppermint Patty Treats

Monday, October 18, 2010

Little Ghost Earrings (Part 2)

Here is the second part to the Little Ghost Earrings video.  Have fun, and Happy Halloween!

Thursday, October 14, 2010

Little Ghost Earrings

This is a fun project that you can do with your children, or make a pair for yourself.  Believe me when I tell you that just about everyone who sees you wearing these will want a pair.  Have fun, and be sure to check back soon for Part Two.  Feel free to email me with any questions you might have, and I'd love it if you'd leave a comment if you like the video.  Thanks!

Wednesday, October 13, 2010

Haunted House

Here's the second project I did for the Glue Dots (R) Design Team.  The house is by Doodlebug Design, and I used Glue Dots (R) to assemble and decorate it.  Thanks for stopping by.

Sunday, October 3, 2010

Happy Halloween Banner


            Materials
·        Cardstock:  white, orange, purple, green, black, yellow, orange glitter
·        Craft Glue Dots ®  
·        Sparkly Fluff - Our Craft Lounge
·        Cricut machine and cartridges  (I used Sure Cuts a Lot software, the Happily Ever         After Cricut cartridge, and  the George and Basic Shapes cartridge.  You can find similar images on other cartridges.) – Provo Craft
·        Souffle pens – Sakura
·        Stamps:  Everyday Character Faces – Peachy Keen Stamps; Owl – Hampton Arts
·        Ribbon
·        White gel pen
·        Clear glitter pen
·        Chalk
·        Black permanent ink
·        White ink

            Directions  (Refer to photos for placement of all pieces.)

1.      Using Cricut machine and cartridges of choice, cut the following:
·        15 scalloped triangles at 4” from orange, green, and purple cardstock.
·        14 circles at 3 ½” from black cardstock.
·        1 circle at 3 ½” from yellow cardstock.
·        1 circle at 2” from green cardstock
·        1 scalloped circle at 2 ½” from orange cardstock
·        1 pumpkin (blackout) at 2 ½” from orange cardstock
·        the letters “H-A-P-P-Y-H-A-L-L-W-E-E-N” AT 3” from orange glitter cardstock.
·        1 spider at 3” from black cardstock.
2.       Stamp face onto pumpkin using black ink and onto spider using white ink.  Color whites of eyes with white gel pen.
3.      Using Souffle pens, add dots and dashes around the edges of the  circles.
4.      Adhere circles to triangles, following pattern in photo.
5.      Stamp owl onto white cardstock using permanent black ink. 
6.      Apply Glue Dots all over owl’s surface, being careful to avoid the eyes.
7.      Sprinkle Sparkly Fluff and press gently to adhere to owl.
8.      Layer the owl, the green circle, and the scalloped orange circle.
9.      Using the photo as a guide, adhere letters and shapes to black circles using Glue Dots ®.
10.  Thread triangles on ribbon and hang.


HAPPY HALLOWEEN!!

(I made this banner while working on the Glue Dots (R) Design Team. with products supplied by Glue Dots(R).)


Wednesday, September 22, 2010

Monday, September 20, 2010

Stamp Scrap Art Tour, Rhinebeck, NY


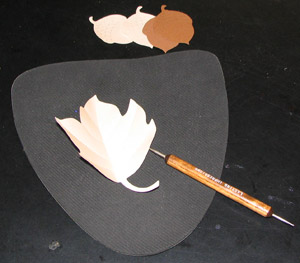
Art Gone Wild had some fabulous display boards.
Yesterday I took a 2-hour drive and went to the Stamp Scrap Art Tour in Rhinebeck, NY; and, although I had a great time visiting with my BFF, Tina, I have to honestly say that the show wasn't really worth the trip.  Yes, I bought some cool stamps and other goodies that I can't find in my local craft stores (I don't have any local scrapbook or stamp stores); but some really big names in the stamping and scrapbooking world were missing. 

I wasn't expecting many scrapbook vendors, because this is primarily a stamping expo.  It makes me wonder why it's called the Stamp Scrap Art Show in the first place, but I'm not going to get hung up on the name.  It was still disappointing not to see Marco's Paper and Outlines.  Those are two booths that I always look forward to visiting.

There were 18 vendors in all, and you can find the links to these vendors on the Stamp Scrap Art Tour site:  Custom Wood by Dallas, Heartfelt Creations, Repeat Impressions, Just For Fun, Motivet Rubber Stamps, ScrapDazzle, Darcie's Country Folk, Stampers Anonymous, Inky Antics, Art Gone Wild, Stamp Camp, Lost Coast Designs, Seaside Stampin' Ink, Central Perk Scrappers, Rubber Cottage, Stamp On It, Sweet Stamps.com, and Purple Daisy Designs. 

It was good to see some new companies (e.g. Central Perk Scrappers, Just For, Fun, and Stamp On it).  In fact, some of the demos were very well done.  The make 'n takes left a lot to be desired, though, and we didn't try any of them.  I believe that there shouldn't be a charge for make 'n takes, but that's another story.

I don't know if Saturday's turnout was better than yesterday's, but I doubt it.  Most of the vendors seemed disappointed and unenthusiastic.  Some traveled quite a long way from home and invested quite a bit of money, time, and effort in this show; however, the exhibit hall was depressingly deserted.  You would think that Tina and I would have won one of the door prize drawings, then, right?  That might have made the trip worth it, but no such luck.

I have the sinking feeling that we've seen the last of the Rhinebeck SSAT.  The loss of some of their biggest vendors and the decline in consumer attendance don't bode well for this venue.  I will miss it, as there aren't many expos of this type in New York as it is.  Oh, well, hopefully the Greater New York Stamp Show will have a better turn-out, in terms of both vendors and consumers. 

Thanks for checking in, and remember to be your crafty self.

Friday, September 17, 2010

Scrapbook Sketch

Sketches can be a very useful starting point for both scrapbook pages and cards.  For this sketch, I’ve kept things pretty simple.  The main part of the sketch is a photo collage, which allows you to vary the size and placement of your photos.  You can crop as little or as much as you want, and you don’t have to worry about lining up all of your photos perfectly.  Then write or print your journaling on strips of cardstock, and arrange them on your collage.
A punched or die-cut border at the bottom and (optionally) at the top is an effective way to focus attention on all the photos in your collage.  An oversized die-cut behind the mat under the photos breaks up the solid color background paper.  Finally, add a simple title and three embellishments to form a visual triangle, and you’re done!


I chose to create a double-page Christmas layout with a “present” theme.  Brenda Walton’s Peppermint Twist patterned paper was just what I needed to add some pizzazz to my solid background.  The large die-cuts and bottom borders were cut with my Cricut Expression using the Walk in My Garden cartridge.  I used my Fiskar’s Threading Water border punch and Martha Stewart's Gingerbread Trim edge punch to create unique embellishments out of coordinating scraps of paper.  I cut the title using the Alphalicious cartridge and added a few buttons as a finishing touch.
I hope you are inspired by this sketch to create your own fast, fun, and easy layouts this month.  You’ll be finished so quickly that you’ll have more time to spend making memories than trying to scrapbook them.  Happy scrapping!

Saturday, September 11, 2010

I'm a Dottess!!

Glue Dots Office/Home Variety Pack Contains Permanent, Removable and Poster Dot 'n Go Applicators (85111)Yes, you read that right.  I've been chosen to be on the Glue Dots Design Team, and my title is Dottess.  I'm so looking forward to being on the team and working with all of the talented folks there.  Check out the blog for the complete list of Design Team members, as well as some fantastic craft projects and ideas.  Thanks for stopping by, and I'll "see" you soon.

You can try them for yourself by clicking here: 
Glue Dots Office/Home Variety Pack Contains Permanent, Removable and Poster Dot 'n Go Applicators (85111)

Saturday, September 4, 2010

3-D Cards With the Crafter's Companion

Are you tired of making the same old standard-sized cards again and again?  Well, get yourself the Ultimate Crafter's Companion , and you’ll be able to create some of the most eye-popping cards you’ve ever seen.  Follow the easy steps in the manual, and you’ll never make a plain card again.

This is a pop-out card that I made for a dear friend for Mother’s Day.  Following the directions on p.9 in the manual, I started with two sheets of 8 ½” x 11” cardstock.  I used solid cardstock and added layers of patterned paper to the front and inside.  To create the hanging focal image inside, I sandwiched a piece of nylon fishing line between two identical punched shapes.  Then I secured it behind the top crease with a piece of tape, making sure that it didn’t extend beyond the edges of the folded card.
   
    I made this accordion card for an adorable two-year-old girl’s birthday.  Following the directions on p.4 in the manual, I began with a sheet of cardstock that measured 4 ¼” x 11”.  After creating the base of the card, I used the embossing design on the board and cut out a scalloped border.  Finally, I inked all of the edges with pink pigment ink.  This card is quite easy; and you can decorate it with die cuts, patterned paper, or just about anything else you’d like.  This type of card also makes a wonderful gift card holder.  Simply adhere the front and middle panels together, leaving the top end open, and this will create a pocket that is just the right size for the gift card.
    These are only two of the many different styles of cards, boxes, and envelopes that you can design with the Ultimate Crafter's Companion.  With this all-in-one crafting tool, never again will you be limited to single-fold, standard-sized cards.


(I did not receive any compensation from Crafter's Companion for writing this article.)

Monday, August 16, 2010

My Crafty Life, Episode 8: Metro Card Earrings

This is a great project to make with your 'tween and teen girls.  Not only does it provide for some quality mother-daughter time, but it is also a fun and educational recycling activity.  Not to mention that they're making something cool and funky that they can wear.  Wickedly awesome!  (If you would like to purchase these earrings already made, please visit my Etsy shop at Wednesday's Dream.)

Tuesday, August 10, 2010

Half a Layout

Busy, busy, busy.  Here's half a layout I did for my son David's school album.  I didn't post the other half because his classmates are in it, and I don't post photos of others without permission.  On this layout, I used patterned paper from a stack by DCWV.  The title has metal letters from Making Memories that I painted with acrylic paint to match my papers.  I used some star brads and some chipboard shapes from Basic Grey to complete the page.  Thanks for stopping by, and enjoy your week.

Saturday, July 31, 2010

I have 2 New Articles on Scrapjazz

This one is a Cricut Tutorial using the Create a Critter cartridge.  The card was featured on this post..

This article explains how to make 2 types of step cards.  I taught this at my last workshop.  Happy crafting, and remember to be your crafty self.

Monday, July 26, 2010

Scrapbooking Tip: Step Out of Your Comfort Zone

     For Haley's 4th Grade school layout this year, I decided to change things up a little bit.  I've been using the Brenda Walton Citrus Neopolitan collection up until now, but I saw the most adorable school papers by Creative Imaginations last month.  I just had to use them.  Because I didn't have a lot of photos, I copied and reduced the certificates she earned this year, and I used them instead of photos on the left side of the layout.  I focused on Science and Chorus, because those were Haley's favorite subject and activity this year.
     The music transparency is from Hambly, and I made all of the embellishments with my Cricut (Locker Talk).  I jazzed up some plain white circles that I had cut awhile ago, and they are behind the die cuts.  I colored them with Bic Mark It markers and added dots with Sakura Souffle Pens and Crystal Lacquer.  This was a lot of fun for me, because it was a big change from the other school layouts in Haley's album.
     The next time you're in a slump, or you just don't feel like doing the same-old-same-old, step out of your comfort zone and change things up a bit.  And remember to be your crafty self.  Thanks for stopping by.

Wednesday, June 30, 2010

10 Questions With Wendy Smedley

Hi everyone! Check out my latest article at Scrapjazz. I interviewed Wendy Smedley! And, as always, remember to be your crafty self.

Saturday, June 26, 2010

New Earrings on My Etsy Site


Hi! I've decided to re-open my Etsy site (http://www.scrapjanny.etsy.com) and list some new earrings. Please stop by for a visit. Thanks!