Friday, November 15, 2019
Holiday Card Throwback #5: A Really Simple Happy Holidays
Hey, good to see you again! I'm continuing my progress through KW's 2009 Holiday Card Series, and I think this one is something almost all of us can do. If you have a die-cutting machine, some letter stamps, spray ink, and white embossing powder, this is a piece of cake. Hope you enjoy!

Thursday, November 14, 2019
Holiday Card Throwback #4: Button Snowman
It doesn't get much easier than this! Whip up a bunch of button snowman cards, a la Kristina Werner. Re-visiting this series is giving me so much inspiration, and it's so much fun to watch her use products that I haven't used in a long time. Enjoy!
Sunday, November 10, 2019
Holiday Card Throwback #3
Hey there! Here's another cute and easy one from KW's 2009 Holiday Card Series. You can adapt this card to use what you already have - especially all that ribbon I know you're hoarding! Enjoy!
Saturday, November 9, 2019
Holiday Card Throwback #2
Hi there! Did someone say "Coluzzle"? Check this out! Here is another "Oldie But Goodie" from Kristina Werner's 2009 Holiday Card Series to inspire you. Enjoy, and thanks for stopping by!
Friday, November 8, 2019
Holiday Card Throwback Series
Hey everyone! Today is the first day of my Holiday Card Throwback Series, where I will post "blast from the past" videos showing how to make holiday cards. Have you got supplies that you've bought over the years because someone did something cool with them? Have they been sitting around doing nothing ever since? Maybe you'll see them used in one of these videos!
Please note that these are not my videos, and I'm not endorsing any of the original posters or the companies mentioned in the videos. I haven't received any compensation from anyone. I'm sharing these for fun and inspiration. I hope you enjoy them as much as I do!
************************************************************************
Today's video inspiration comes from Kristina Werner's 2009 Holiday Card Series. She uses her Cricut Expression with SCAL, the Fiskars Threading Water punch, the WRMK Corner Chomper, and an old SU snowflake punch! (Maybe we have some of these?) Enjoy!
Saturday, June 29, 2019
Alcohol Ink Backgrounds
Yesterday I decided to play with my alcohol inks, and I tried some different substrates. I used Yupo paper, glossy paper, and the front and back of photo paper. I got the idea to use the back from a video on YouTube. The woman who made the video said it was very similar to Yupo paper, so I gave it a try. The glossy side of the photo paper wasn't successful, The inks didn't move at all, since they were absorbed into the paper very quickly. The results I got from the regular glossy paper weren't that great either. Here are the rest of the results, with a description below the photo:

(Please note that I provide Amazon Affiliate Links whenever possible. Thank you for your support!)
I used Ranger/Tim Holtz alcohol inks in the following colors): Red Pepper, Valencia, Sunset Orange, Peach Bellini, Sunshine Yellow, Lemonade, Limeade, Citrus, Aqua, Turquoise, Mermaid, Cool Peri, Purple Twilight, Eggplant. I also tried the Brea Reese alcohol inks in these 3 colors: Rose, Kelly Green (no link available), and Ocean Green.
The top 2 backgrounds were done on Yupo paper, which I found to be the most successful substrate. It was easy to move and blend the inks, and I was able to create those beautiful cells that I love so much. In all the backgrounds, you will see small flecks of Deco Foil that I applied while the ink was still a little tacky. I used leftover scraps that I had used on other projects, just a dab here and there.
In the next row, the orange background on the left was done on the back of Canon Glossy Photo Paper. I was surprised at how successful this was. Although the inks didn't move quite as easily, and they took a little more work, I was happy with the results. The finish is more matte than that of the Yupo paper. The second background was done on Yupo paper.
The background (it's actually one cut in half) in the bottom row was made on the back of HP Glossy Photo Paper. Like the Canon paper, I had to work a little harder with this one, and it was my least favorite. I did like the end results, but the Alcohol Ink Blending Solution and plain alcohol that I used reacted in a strange way with the coating on the back of the paper. Some spots were shiny, and others were matte. Some of the ink also rubbed off, but I buffed the paper with a paper towel when I was done. No more ink is rubbing off now, and I was able to make the 2 card bases that you see in the photo.
Overall, my favorite substrate to use is still the Yupo paper. It's the most expensive, but there are cheaper alternatives available on Amazon as well. The back side of photo paper is a less expensive way to go, especially if you have tons of it like I do.
Play around with different substrates, and see what happens. You might be pleasantly surprised at the results! Thanks for visiting, and remember to find a little joy every day.
Tuesday, June 4, 2019
New Items in My Etsy Shop! Spring and Summer 2019
Hi Everyone!
I hope you're enjoying this spring weather as much as I am! This is my kind of weather. Not too hot and not too cool. I like the summer too, but only if I can get to the beach to enjoy the cool ocean water and sea air.
I tend to use the colors of the ocean - blues, greens, sometimes purples - in my creative projects, including the jewelry I design.
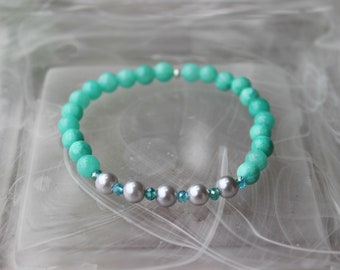
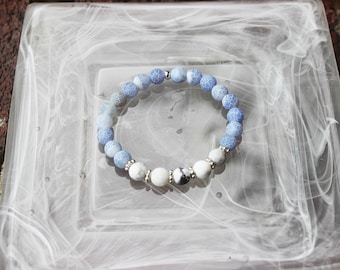
This beautiful and fun bracelet can be found at Jeanette's Crafty Place, my online Etsy shop. There you will find hand-made jewelry that I have created to express my love of all things summer and beachy. Here's another look at what you'll find if you visit:
I hope you're enjoying this spring weather as much as I am! This is my kind of weather. Not too hot and not too cool. I like the summer too, but only if I can get to the beach to enjoy the cool ocean water and sea air.
I tend to use the colors of the ocean - blues, greens, sometimes purples - in my creative projects, including the jewelry I design.
This beautiful and fun bracelet can be found at Jeanette's Crafty Place, my online Etsy shop. There you will find hand-made jewelry that I have created to express my love of all things summer and beachy. Here's another look at what you'll find if you visit:
If you comment on this post and place an order during the month of June, I'll include a free gift box for your jewelry with every purchase. Custom orders are also available upon request. If you don't see it, ask for it!
Thanks for stopping by, and always remember to let your creativity shine!
Subscribe to:
Posts (Atom)
