Showing posts with label summer. Show all posts

Tuesday, June 4, 2019

New Items in My Etsy Shop! Spring and Summer 2019

Hi Everyone!

I hope you're enjoying this spring weather as much as I am!  This is my kind of weather.  Not too hot and not too cool.  I like the summer too, but only if I can get to the beach to enjoy the cool ocean water and sea air.  

I tend to use the colors of the ocean - blues, greens, sometimes purples - in my creative projects, including the jewelry I design.


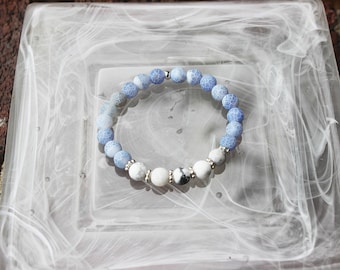
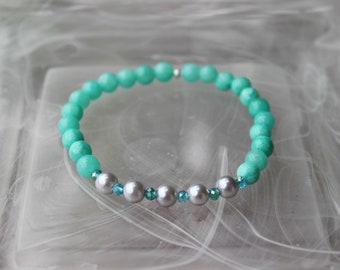
This beautiful and fun bracelet can be found at Jeanette's Crafty Place, my online Etsy shop.  There you will find hand-made jewelry that I have created to express my love of all things summer and beachy.  Here's another look at what you'll find if you visit:


If you comment on this post and place an order during the month of June, I'll include a free gift box for your jewelry with every purchase.  Custom orders are also available upon request.  If you don't see it, ask for it!

Thanks for stopping by, and always remember to let your creativity shine!

Sunday, August 11, 2013

10 Summer Photos

Here's a short video I did for my pals over at Scrap 'n Yap.  They were talking about a free class at Big Picture Classes called 10 Summer Photos.  It's a short video, and it isn't the best quality, but you'll get the idea.  I hope to record a better video soon; but until then, I hope you like this one.

Tuesday, July 16, 2013

My First Layout for Scrapper's Playground

Hi everyone!  Here is my first layout for the Scrapper's Playground Design Team.  


Supplies:

·         Stars & Stripes patterned paper by Doodlebug Design
·         Bazzill cardstock in blue, light blue, and white
·         Stars & Stripes Fancy Frills stickers by Doodlebug Design
·         Stars & Stripes Mini Doodle Pops by Doodlebug Design
·         Stars & Stripes Doodle Seals by Doodlebug Design
·         Star Spangled washi tape by Doodlebug Design
·         Baker’s Twine by Doodlebug Design
·         Candy Shoppe Ice Accents by Queen & Company
·         Wink of Stella clear glitter marker
·         Tiny Attacher by Tim Holtz/Ranger
·         White gel pen
·         Embossing folder with dots*

To put this layout together, I first arranged my photos into collages and adhered them to the layout.  Then I cut out my title with my die cut machine.  A comparable font for the Eclips would be Valentine’s Day & Happy Heart.  For added dimension, I used an embossing folder on the “Smiles” letters.  After adhering the title, I added my journaling strips and border strips/paper. 

Next I added foam adhesive to the backs of the banner sticker pieces and adhered them to a length of baker’s twine.  After stapling the ends of the baker’s twine to the layout with my Tiny Attacher, I tied two bows and glued them to the ends of the banner.  As a finishing touch on the banner pieces, I added dots of white gel pen.

The final step in assembling the layout was to add the embellishments.  I added the stickers, pinwheel, and washi tape; and then I made a medallion/rosette with some of the patterned paper.  First I scored a strip of 1 ¼” x 12” patterned paper at ¼” measurements.  Then I accordion-folded the strip and glued the ends together.  Using a generous amount of hot glue, I glued the medallion in the center, attaching a cardstock circle on the back for stability.  I then added some Wink of Stella glitter marker to the edges of the medallion and the circles in the embossed title. 


The last step was to add the cardstock sticker and Ice Accent to the center of the medallion.  Because this is a heavy embellishment, I attached it to the layout with hot glue.  (I believe acid-free white glue would work also, but I didn’t want it to fall off the layout while hanging on the wall).

I hope you like the layout and that you get a chance to stop by Scrapper's Playground to see them in person, and to check out the cool stuff in the store.

Happy scrapping!

Thursday, June 13, 2013

A Splash of Fruit: Summer Color Combo

Hi everyone!  I hope you are enjoying the warmer weather, despite the "rain, rain" that doesn't want to "go away."  Well, scrapbooking is a great indoor activity for those rainy days, and my latest article is up on the Scrapjazz website.  I've posted it below also.
Please leave some feedback here on my blog about this article, as well as article topics you'd like to see in the future.  Are you interested in videos?  Are there specific products you'd like more information about?  Let me know, and I'll do my best to cover those topics/products.
Enjoy the article, and remember to be your crafty self!


A Splash of Fruit:  Summer Color Combo
by Jeanette Giancaspro


Fruit is a hot trend in the scrapbooking industry right now.  Several manufacturers are featuring both a fruit theme and fruity colors in their summer lines this year.  Although I’m not a trendy scrapbooker, I’ve always liked bright, fresh, fun colors. 


This layout is from a few years ago, but you can see how I used paper with strawberries and cherries, as well as fruit-colored papers.  I wrote the journaling on a strawberry die cut, and the flowers were part of the paper’s design.  I cut the title with my Big Kick (Big Shot), using a QuicKutz alphabet. The sunglasses, pail and shovel, and flip-flops are Sizzlit dies, and I cut them out of foam.


This layout is more recent, but the color palette is basically the same.  There is more orange and blue, and a little less green and pink, but the colors are still bright and “fruity.”  Instead of die-cutting the title, I painted chipboard letters to match my papers.  This time I used my Cricut machine to cut the embellishments, and I stamped the fish and the smaller words in the title. 

As you can see in the second layout, these freshly-picked colors aren’t only for “girly” layouts. They work just as well with pictures of the men in our lives.  And they aren’t just for summer either.  The colors in this palette are perfect for birthdays, travel, celebrations, children, and many other themes.

There is an old saying:  “Everything old is new again.”  It certainly applies to the scrapbook industry.  Although the papers that I used are no longer available, the new lines of products have a very similar look and feel to them.  Here are a few of my favorites:


Now that the warm weather is finally here, I’m sure that many of you will be out and about taking pictures of the fun you’re having outdoors.  I hope you’ll try using some of these fresh and fruity colors on the layouts that you make with those pictures.  

Tuesday, February 12, 2013

Starting Project Life


Designed by Becky Higgins a few years ago, Project Life is a system, or style, of scrapbooking that involves weekly layouts that chronicle your everyday life.  Photos, journaling, and embellishments are placed in divided page protectors of varying styles and sizes.  Although official Project Life products are available only through Becky Higgins and her affiliates, there are many companies that make products designed for use in Project Life systems.
When I first heard about Project Life, I knew that there was no way that I would be able to take a photo every day and create a layout with those photos every week.  So I never even considered it, although I did admire some of the creative layouts that I was seeing in galleries and on blogs.
It wasn't until this past summer that Project Life became a realistic possibility for me.  I realized that I didn't have to create a layout a week.  I could make a layout a month.  I didn't have to follow any rules.  I could adapt this concept to work for me!
During the eleven years that I've been scrapbooking, I've come to realize that there are no hard and fast rules that scrapbookers have to follow.  Realizing this made it so much easier to start Project Life, because, as we all know, starting a project is often the most difficult part.  So deciding to begin my project in August, as opposed to January, was the first decision I had to make.  The rest came easily.
I chose a 12 x 12 three-ring binder for my album.  Then I decided on divided page protectors by We R Memory Keepers andAmerican Crafts; and I'm using the 4" x 6" landscape, portrait, and mixed orientation designs.  My journaling will be typed, and my embellishments and titles will be simple (the month and year).
The most challenging part of this project for me was, surprisingly, the journaling - not in terms of what to write, but deciding from whose point of view the stories should be told.  Even though I almost always write my journaling to my children, this time I'm writing to myself.
I finally decided to use a journal app on my iPhone, called "Day One," that allows me to write in journal form and add photos to my entries.  This also enabled me to have all of my photos in one place, although I did include photos from my regular camera as well.  It was so easy to keep my journaling in the same format and just print it out. 
The most important thing to remember when doing Project Life is that you can change things around any time you like.  The system is flexible, and there are lots of ideas and products to help you achieve your individual goals.  Before you begin this project, however, you should answer these questions:
  • Will you be creating a layout weekly, monthly, or randomly?
  • What type of album will you use?
  • In what size will you print your photos?
  • Which style page protectors will you include?
  • How will you approach the journaling?
  • What types of embellishments and titles will you have?
I really enjoyed my first month with Project Life, and I hope you decide to give it a try too. 

Saturday, October 22, 2011

Scrapbook Those Summer Layouts: A Fun and Simple Beach Layout

 If you're like me, you take lots of summer photos. You also want to fit as many photos on your layouts as possible. You want those layouts to be easy and fun, and you want to make good use of those tools in which you've invested your hard-earned money. I'm going to show you how to make the two-page layout below with just a few sheets of patterned paper, cardstock, buttons, thread, and one foot of ribbon, as well as your Cricut machine. (If you don't have a Cricut, you can certainly use another machine or other pre-made embellishments.)


Use solid cardstock as the base for your pages.

Cut coordinating cardstock into two 12" x 6" panels, and adhere two inches from the top of each page.

Adhere your photos to the panels, which will serve as mats for your photos. This will allow you to include photos of different sizes and orientations, yet have them look cohesive and organized.

Cut patterned paper into eight 3" x 4" rectangles, and adhere directly below photo mats. I alternated both sides of double-sided papers.

Punch decorative border strips from remaining patterned papers, and adhere to the bottom edge of each page.

Using the Cricut with the Jubilee cartridge, cut your title from your choice of papers. I cut "summer" at 1 ½" and "FUN" at 2".

Cut three 3" scalloped circles from kraft cardstock.

Adhere the title "FUN" to scalloped circles, and outline with a white gel pen.

Adhere the title to the right side of the layout, placing "summer" on the top and "FUN" on the bottom.

Add the journaling circle to the left side of the layout.

Freehand cut three circles at approximately 1 ½" and three at approximately 1" in size, all from patterned paper. The circles should NOT be perfect. Layer one of each size to create a flower.

Tie twine through the buttons and attach to the centers of the flowers.

Add ribbon (cut into two 6" pieces) and the flowers to your layout for embellishment.

Here is a list of the supplies I used for this layout:


Brights Cardstock Stack by Die Cuts With a View

Little Yellow Bicycle Journal Tablet by Deja Views

summer-themed patterned papers, such as Barefoot and Bliss by BoBunny

Cricut machine and Jubilee cartridge by Provo Craft

Scalloped-edge punch by E.K. Success

twine, such as this Baker's Twine by We R Memory Keepers

striped ribbon

buttons from my stash


Friday, September 16, 2011

Echo Park's Summer Days Collection

Echo Park's Summer Days Collection


Price: The whole collection is $13.99, but individual double-sided patterned papers are available for $.89 each. You can also purchase double-sided solid cardstock for $.79 a sheet. Other add-ons include: cardstock stickers (including alphabets) for $2.99 a sheet, rub-ons for $2.99 a sheet and decorative brads for $4.99 a package.

Product Description:

The Echo Park Summer Days Collection has just about everything you will need to showcase all of your summer vacation, beach, and outdoor photos. The collection includes a dozen 12" x 12" double-sided patterned sheets of cardstock, one 12" x 12" sheet of alphabet stickers, and one 12" x 12" sheet of element stickers. All of the classic summer images are included: ice cream cones, ice pops, flip-flops, flowers, birds, trees, grass, roller coasters, ferris wheels, suns, pennants, and bicycles. There are stripes, checks, polka dots, scallops, clouds, balloons, and circles. The colors are bright, festive, and fun and just looking at them will bring a smile to your face.

In Use:

It's very rare that I love all of the elements of any scrapbooking collection, but Echo Park's collections are the exception, especially the Summer Days Collection. There isn't a single thing that I don't love about the papers, stickers, and embellishments. The best thing about Echo Park's collections is that the papers are so versatile. You can use them as the base paper for your layouts, or you can cut them apart into large pieces or strips. Some of the design elements are large enough to cut out and use as additional embellishments. One of the cardstock sheets has journaling spots on one side and a bright, summery print on the back. The journaling spots help you to incorporate your journaling into your layout seamlessly and easily. I've also been known to cut apart the display sheet that comes with the collection and use the pieces on my layouts and cards. Even the small sample on the bottom of the cardstock sheets, showing the pattern on the reverse side, can be used. You really get your money's worth with Echo Park!

Tips and Techniques:

Use the papers and stickers in this collection to make bright, fun scrapbook pages for all your summer photos and cards.

Use edge punches to create your own border strips and decorative edges.

Die-cut or punch shapes to use as embellishments for your pages and cards.

Make party decorations and invitations with the colorful, fun summer designs.

Use the papers and embellishments for birthday pages and cards too.